Mount and set up a BEAM-TM node
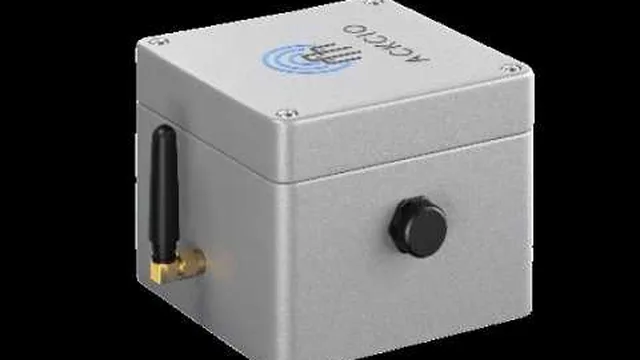
Tilt Monitoring Node: Integrated MEMS Inclinometer Sensor
The BEAM-TM (Tilt Monitoring Node) has a MEMS inclinometer sensor factory-integrated directly into the node housing. No external sensor wiring is required, the sensor is pre-calibrated at the factory and ready to use immediately after commissioning.
Mounting the BEAM-TM Node
Correct physical mounting is critical for accurate tilt measurements. Follow these guidelines:
- Mount the node securely to a stable, rigid surface using the provided mounting hardware.
- Ensure the mounting surface directly reflects the structure you are monitoring, any flex or vibration in the mount will appear in the readings.
- Orient the node according to the axis you wish to monitor. Refer to the BEAM-TM datasheet for the X and Y axis orientation diagram.
- The BEAM-TM measures in degrees. Accuracy is ±0.01° at 15°, ensure the node is properly levelled at installation for a meaningful baseline reading.
- Always remember to mount the Beam TM with its lid facing upward or towards sky.
Configuring the BEAM-TM in Nimbus
Since no wiring is needed, proceed directly to sensor configuration in the Ackcio Nimbus app.
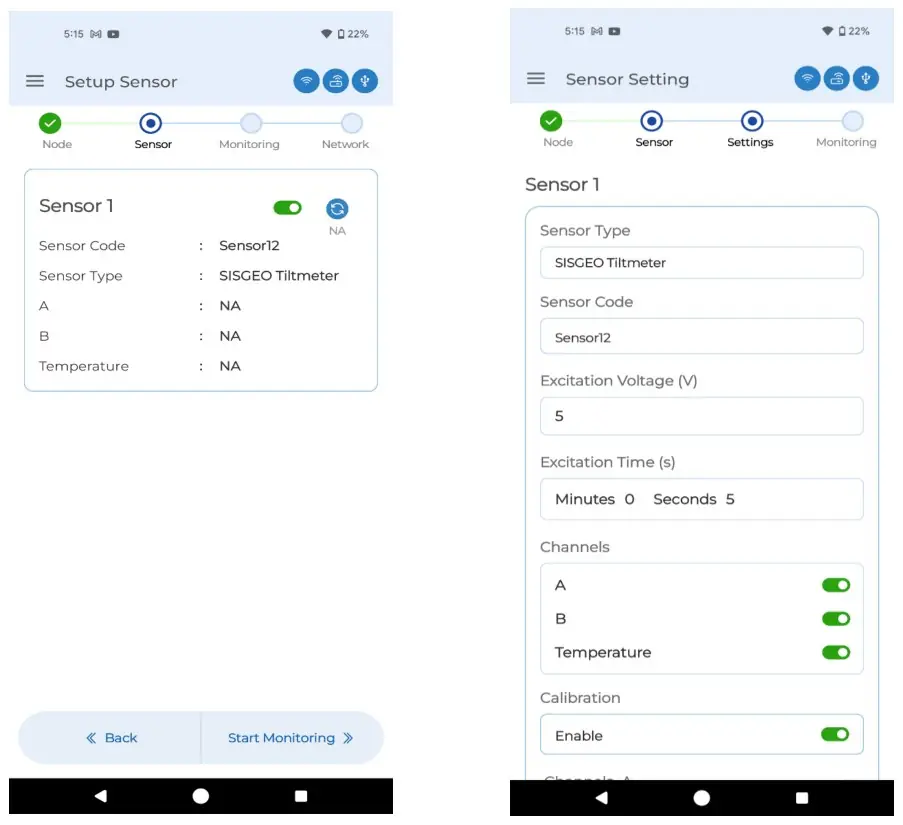
Nimbus: BEAM-TM Sensor 1 setup page (left) and Sensor configuration (right)
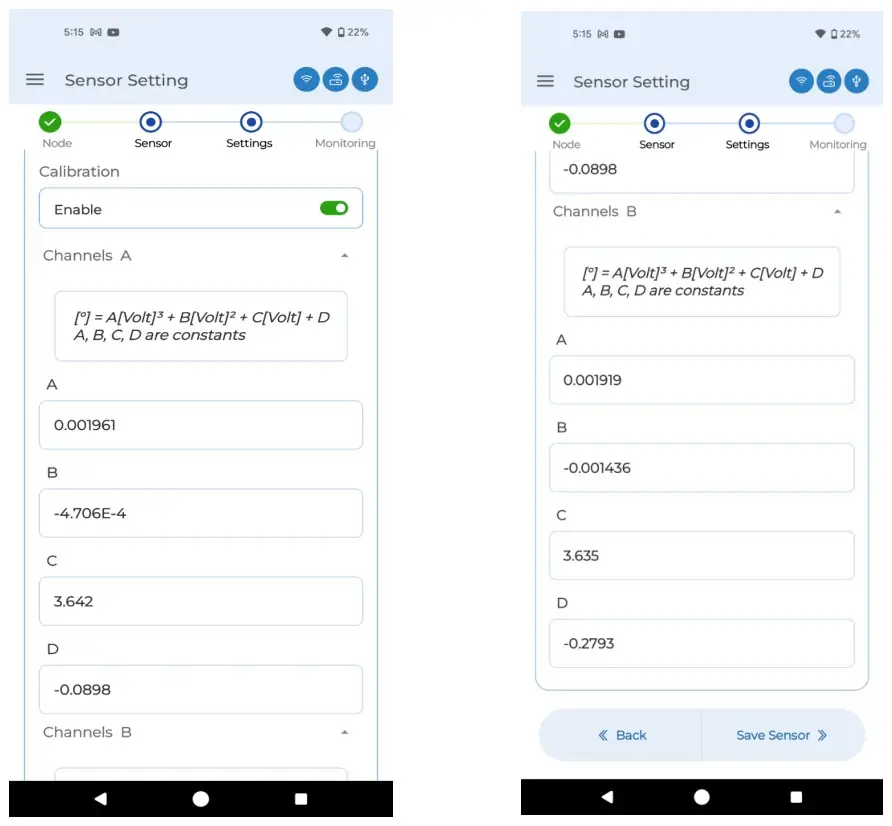
Nimbus: ENABLE CALIBRATION toggle (must be ON) before clicking SAVE SENSOR
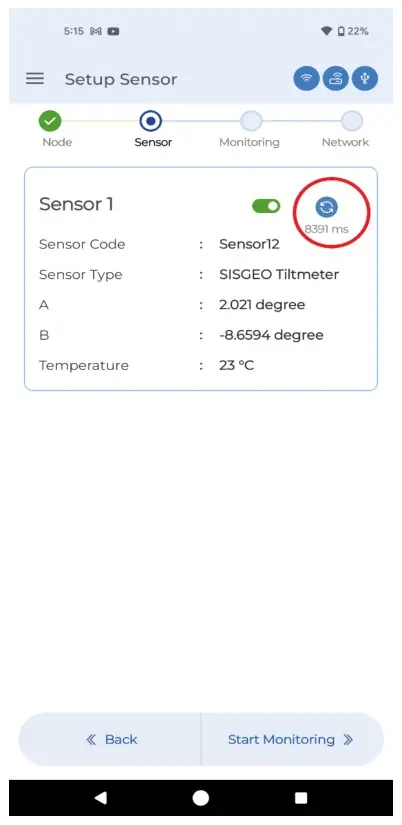
Nimbus: Trigger for live reading by pressing the BLUE REFRESH ICON before clicking START MONITORING
1. On the Sensor Setup page in the Nimbus app, tap on Sensor 1 to begin configuration.
2. Tap Sensor Code and enter a descriptive name for the sensor (e.g., 'TiltNode_Pile_A3'). You may also leave it as the auto-populated default. Excitation time and voltage is default hence you can’t alter it. You can enable/disable tilt A, B and Temp according to your preference.
3. Ensure the ENABLE toggle on Calibration is switched ON. The BEAM-TM sensor is pre-calibrated, this toggle must always remain enabled for the node to produce readings.
4. Tap Save Sensor. The SENS LED will begin blinking as the node takes its first reading.
5. Tap the Blue Refresh icon to trigger a live test reading. Verify the tilt angle values are plausible for the mounted position.
6. Once satisfied, tap Start Monitoring.
7. Clear flash memory if prompted (recommended for new deployments), set your desired sampling rate, and tap Save. The SYS LED will resume blinking once monitoring is active.