Apply engineering formulas (Snape 1.0)
This section of the manual will cover the various features available on your Gateway and Nodes after completing the commissioning process:
Application of engineering formulas on your Gateway
If you would like to process the data from your sensors, our Gateway supports the application of engineering formulas to sensor readings. Do take note that this would apply the engineering formulas to a separate set of readings, so you will receive a set of raw readings and a set of transformed readings:
1. Connect to your Gateway's Wi-Fi network or remote it link
2. Open any web browser on your computer, visit http://192.168.0.10/ or remote it link and login.
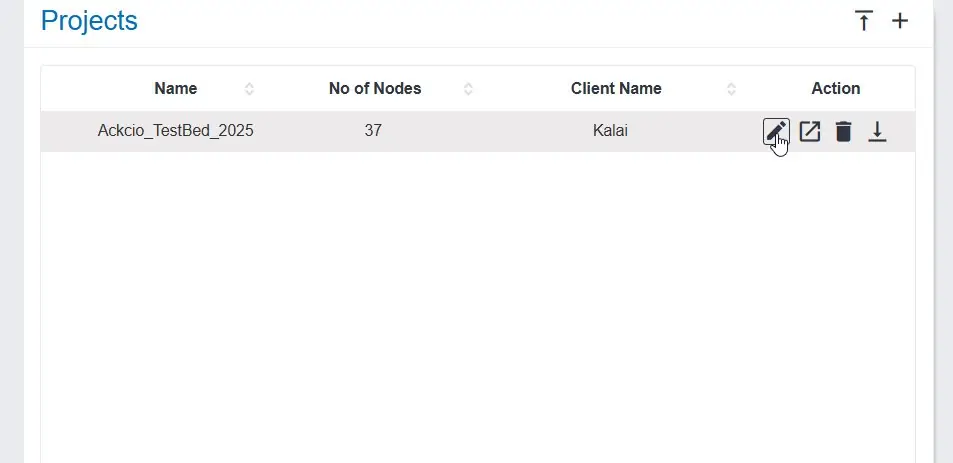
3. Click on the Pen icon next to your project on the Projects panel. This will bring you to the Edit Project page.
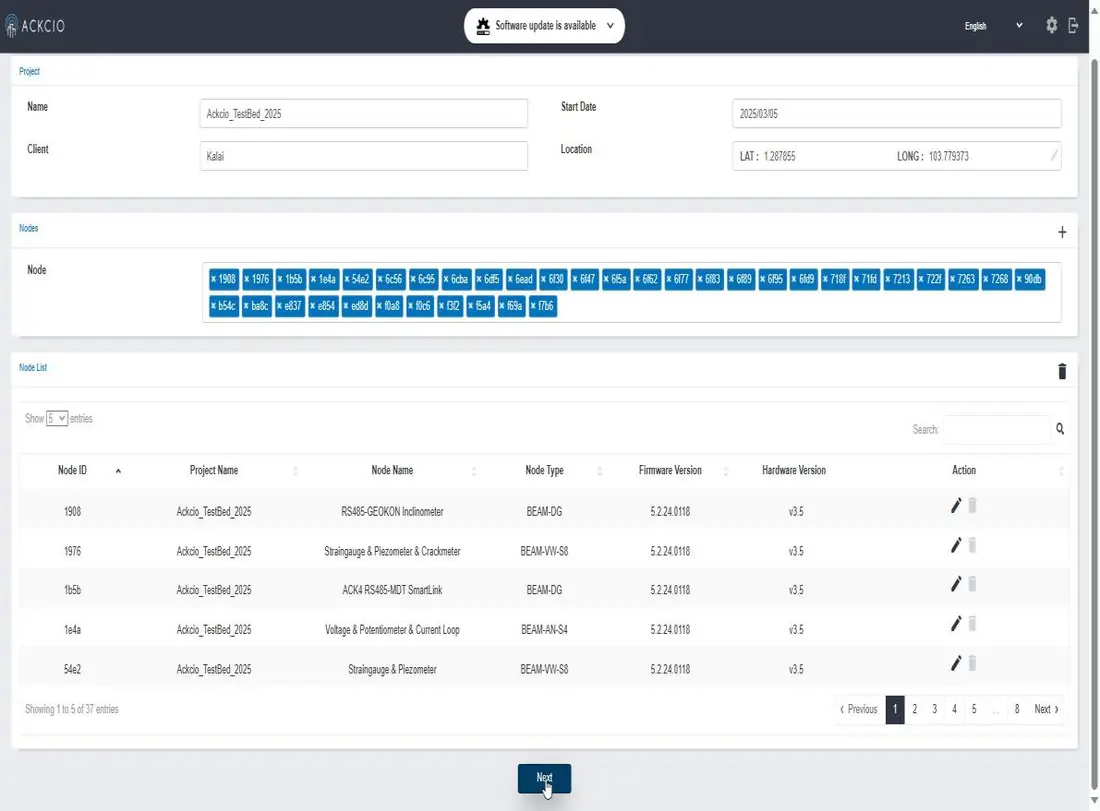
4. Click on the Next button at the bottom of the page. This will bring you to the Nodes & Sensors page.
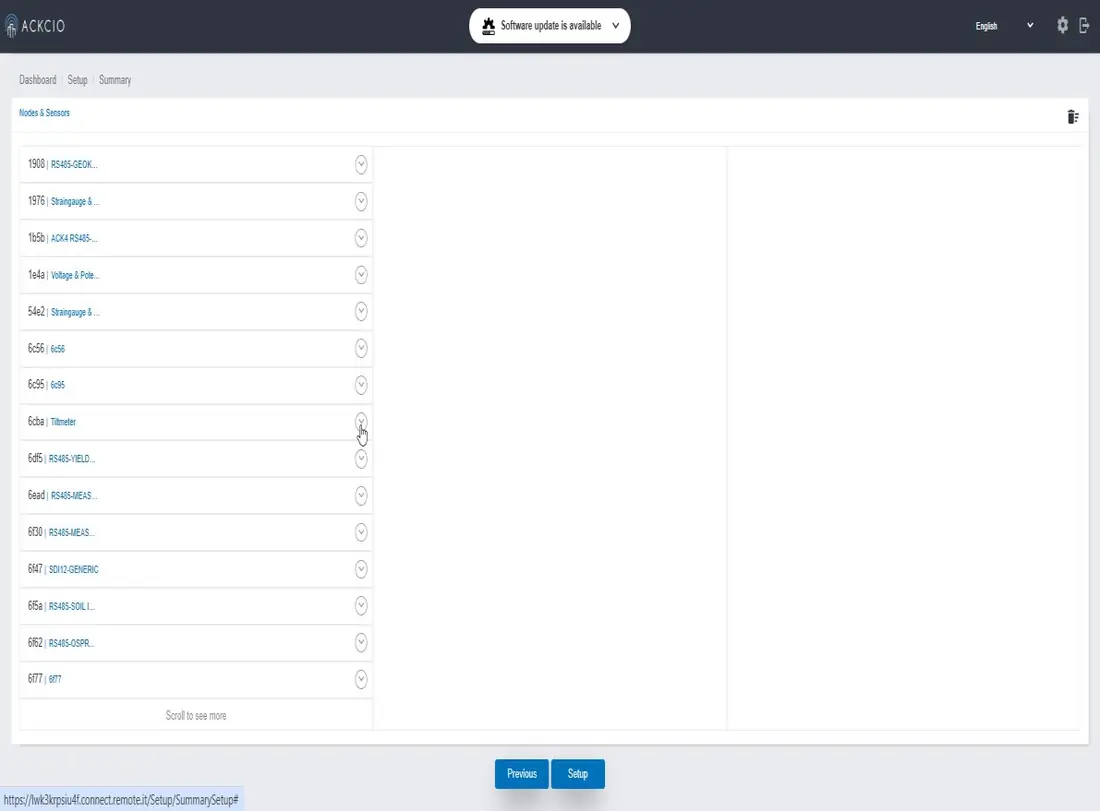
5. Click on the Node whose sensor you would like to apply the engineering formula to. You will then see the sensor's information appear in the middle column of the panel.
6. Click on the sensor you would like to apply the engineering formula to. You will then see all reading types taken by the sensor appear in the right column of the panel.
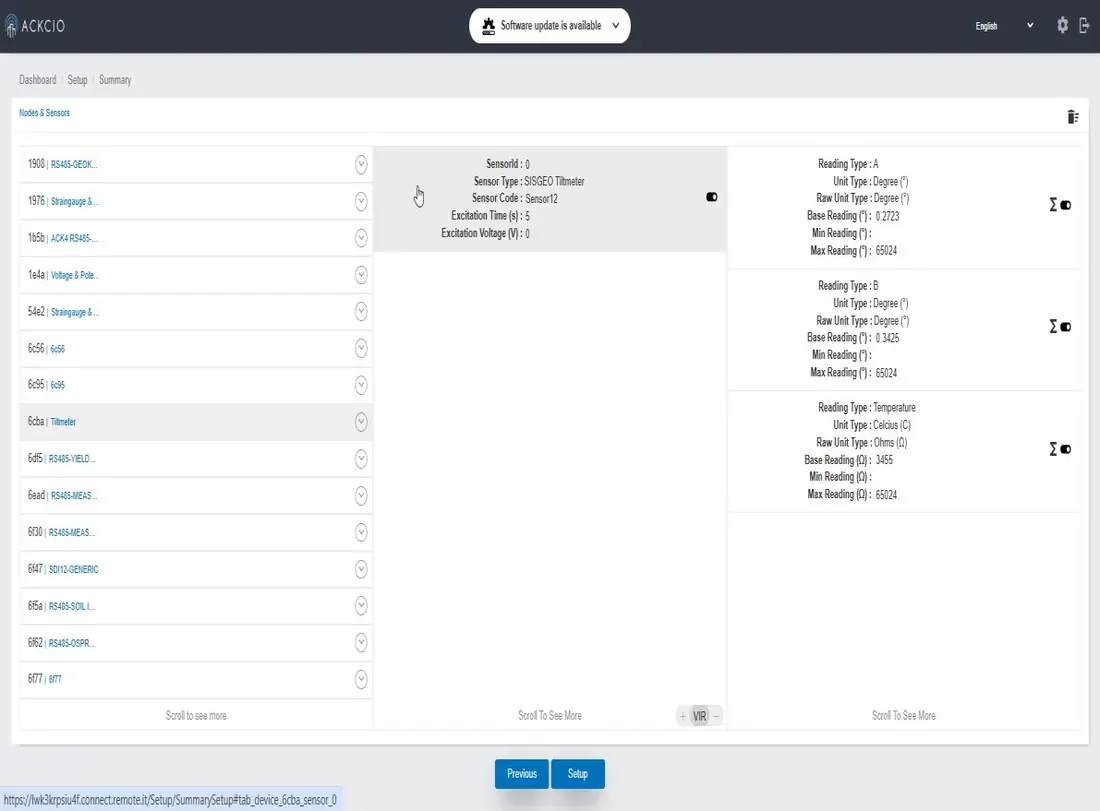
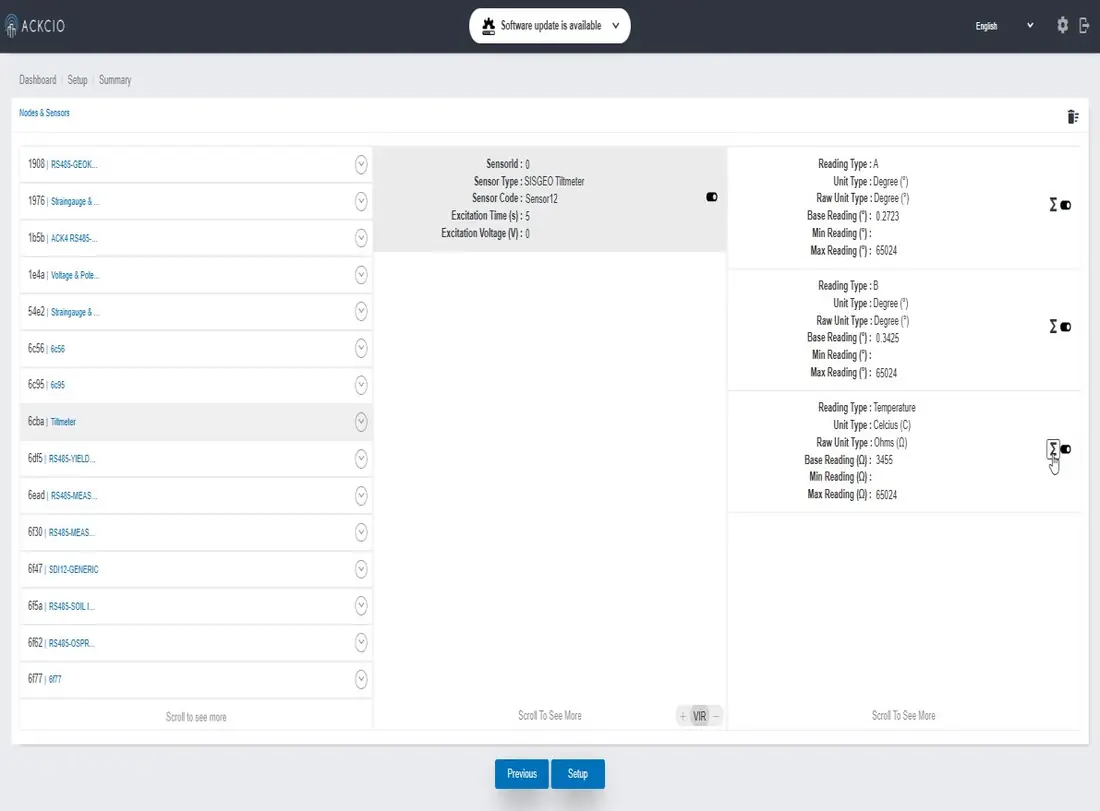
7. Click on the Sigma icon next to the reading you would like to apply. You will then see a popup window titled Configure Engineering Formula appear.
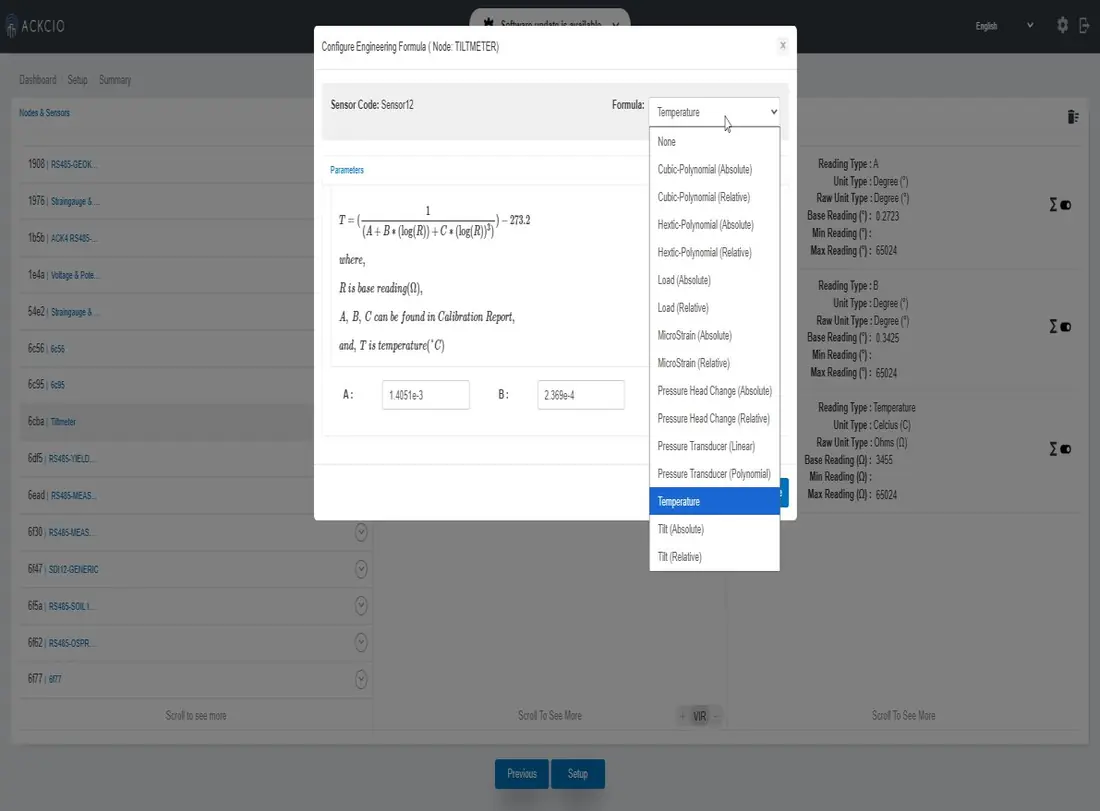
8. Select the formula you would like to apply to your sensor reading, and key in your desired values into the formula's fields. Once you've done so, click on the Save changes button.
9. You can then click on the Unit Type and Base Reading fields to set the appropriate settings for your converted readings.
10. Repeat the previous steps for each sensor you would like to apply formulas to. Once you're done, click on the Setup button at the bottom of the page to apply your changes. Take note that certain formula requires constant which you could easily find it under your sensor calibration sheet.
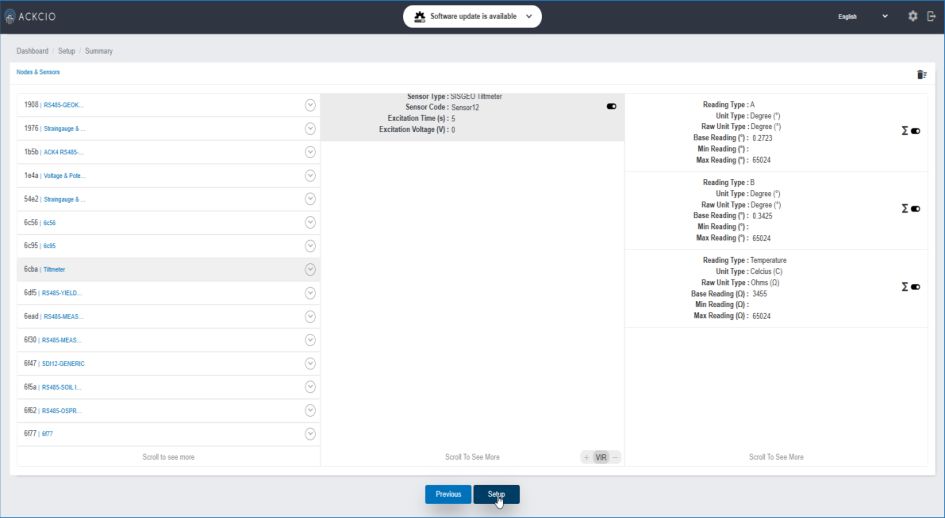
NoticeFrom the next sensor reading onwards, the settings you've selected will be applied to the Readings column of your sensor data. The Raw Readings column of your sensor data will continue to contain the original sensor readings in case you would like to perform data processing elsewhere. Do take note that these settings will not be retroactively applied to your past sensor readings.